| Author |
Topic: Italeri 1/35 PT-105 Build - David Waples |
|
David Waples

TOP BOSS

|
  

 Posted on: Apr 18, 2013 - 9:11pm
|
Okay, here's tonight's work. I removed the trip on the opposite side and sanded my brains out. I found that at the forward end of where I removed the trim where there was a lot of curve I needed to use a round sanding form to obtain the right shape. Just wrap some 100 grit sandpaper around it and sand to shape. A little filler will be required to take care of some nicks.
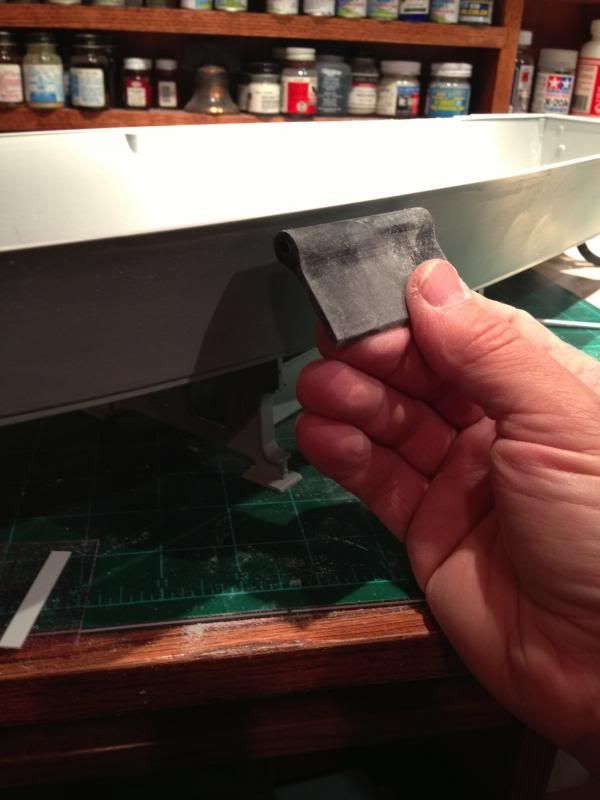
Next I marked on the bow where I wanted to sand down to. Using a flexible ruler i wrapped it around the bow and drew in my reference line. I took my Dremel and ground close to the reference line. Next I used a sanding block with 100 grit sand paper to fair in the curve I was looking for. I finished with my sanding sponge. On the stern I built it up with some Evergreen plastic. I put in a couple of layers and built up the stern to allow for the crown of the deck side to side. I'm going to let that dry overnight before removing the excess.
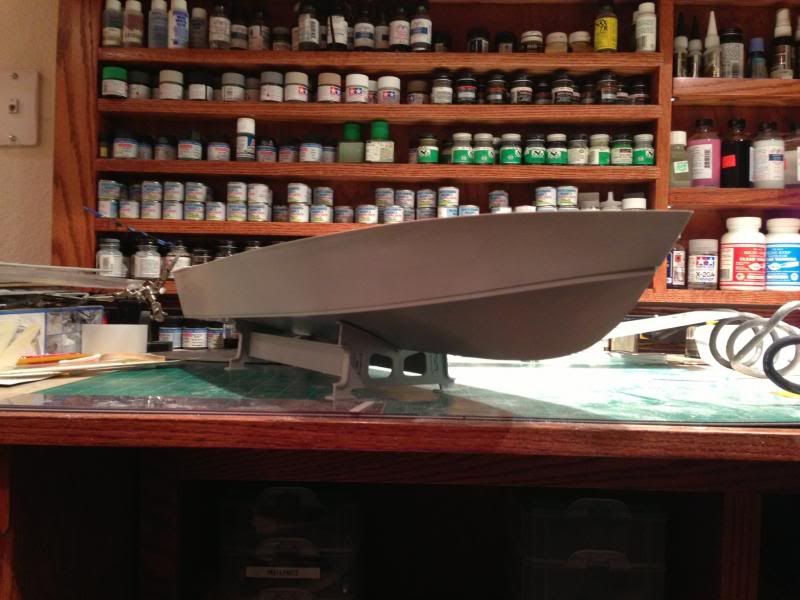
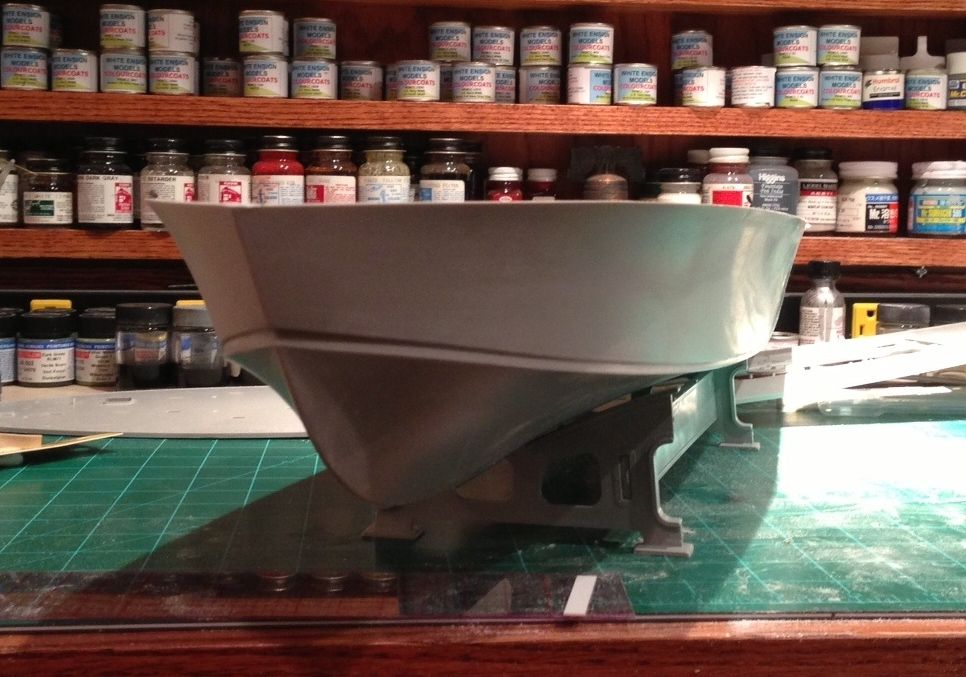
The actual boat is probably a little more exagerated than this but I'm happy with the way it looks compared to photos.
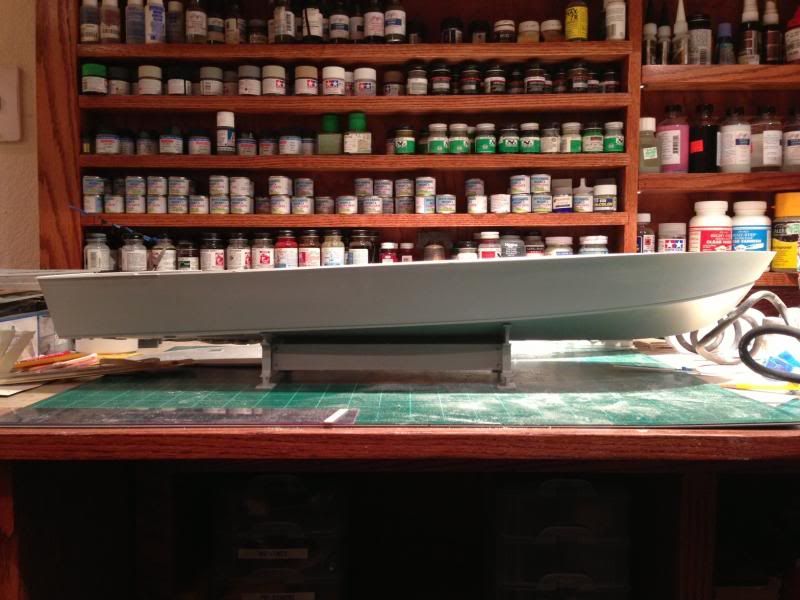
I think the bow shot sells it for me. Not too much, just enough to show off the curves and not screw up the deck.
 ] ]
Over the next few nights I'll finish the stern and work on the frames to support the crown of the deck structure.
Dave
David Waples |
Total Posts: 1679 | Joined:
Jan 2, 2007 - 9:55pm | IP
Logged
|
|
Bob Butler

MASTER

|
Posted on: Apr 18, 2013 - 9:30pm
|
Looking good Dave, I want to finish my boat off so would you and Stu stop finding stuff. I fixed the stern a long time ago but when you found the bow flating out I could'nt look at a photo without seeing it. I had to fix that. LOL
|
Total Posts: 192 | Joined:
Mar 23, 2013 - 11:58am | IP
Logged
|
|
Frank Andruss
TOP BOSS

|
 Posted on: Apr 19, 2013 - 10:31am Posted on: Apr 19, 2013 - 10:31am
|
You guys are crazier than I ever thought. By the time you are done finding things wrong with the kit, you might as well just make your own. Good luck with this undertaking, I am finding it really something, so keep posting the photos.................
|
Total Posts: 3964 | Joined:
Feb 9, 2007 - 11:41am | IP
Logged
|
|
 |
Todd Michalak |

New Member
|
Posted on: Apr 19, 2013 - 8:53pm
|
Hi Dave,
Finally getting a chance to come over and check out your start!! Congrats on cracking the box!! Looks like you have your work cut out for you and I am looking forward to following along.!!
Cheer,
T |
Total Posts: | Joined:
Unregistered | IP
Logged
|
|
David Waples
TOP BOSS
|
Posted on: Apr 20, 2013 - 5:46am
|
Quote:
You guys are crazier than I ever thought. By the time you are done finding things wrong with the kit, you might as well just make your own. Good luck with this undertaking, I am finding it really something, so keep posting the photos.................
|
|
It's all good Frank. I can't say it enough. Out of the box this is an excellent kit. EVERY kit has opportunities for improvement. Designing a kit from drawings and photos (some of them confusing and difficult to interpret) is a difficult task and it's even more complicated with these boats because of all the changes made along the way. And in this scale! It's fun for me to discover the opportunities for improvement with others.
I think everyone's enjoying this kit from what I'm seeing. My intention is to post as much as I can on this build from start to finish. Also be sure to follow Todd's, Stu's, and Bob's builds. I'm hoping there will be more who will contribute as well.
Have fun everyone!
Dave
David Waples |
Total Posts: 1679 | Joined:
Jan 2, 2007 - 9:55pm | IP
Logged
|
|
 |
SteveS156 |
New Member
|
Posted on: Apr 20, 2013 - 12:03pm
|
You guys are exhibiting some serious AMS (Advanced Modelers Syndrome) behavior. Have fun! I look forward to following your builds and trying to apply some lessons learned to my PT 156 build. I can't wait for the Italieri Accessories. If they are considering a second Accessory set, How about a tripod mount 20mm and a turret mount 20mm?
SteveS156 |
Total Posts: | Joined:
Unregistered | IP
Logged
|
|
David Waples
TOP BOSS
|
Posted on: May 2, 2013 - 8:40pm
|
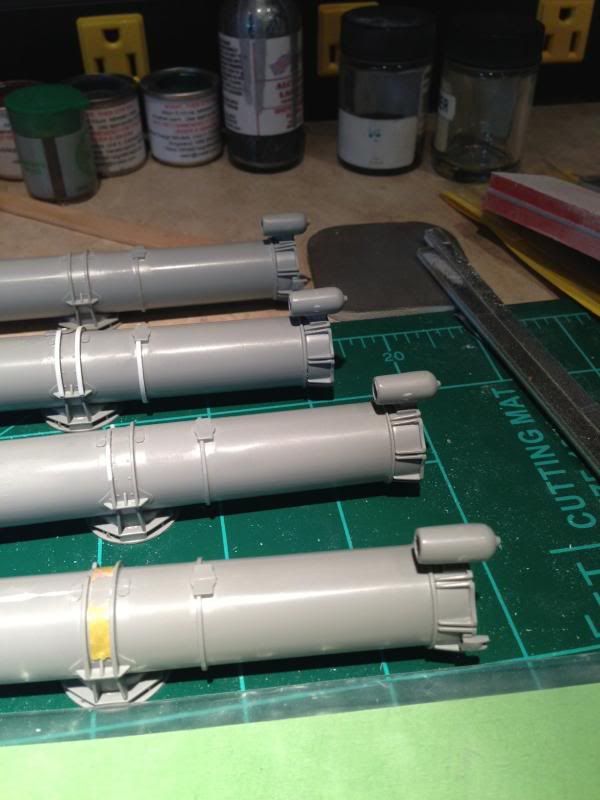
Inspired by Stu's torpedo tube work and the discussion we've been having on the torpedoes, I've started working on them. I've been experimenting on detailing the combustion chambers. More on that later.
The Italeri tubes have a double band where the breach meets the tube. Photos of the prototype show a single band. Using my very thin razor saw I cut off the end band by carefully inserting the blade between the bands and cutting. This went extremely well.
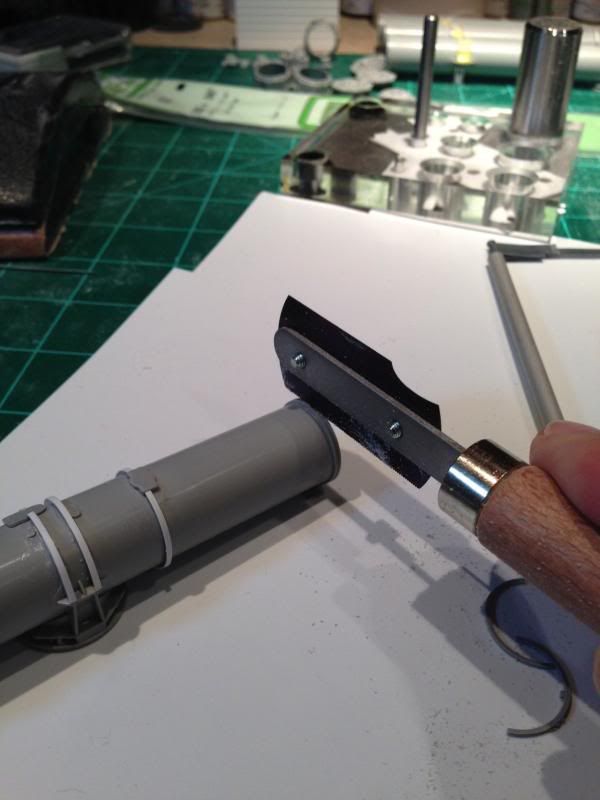
You probably noticed the bands. The bands wrapping the tubes are "T" shaped. I decided to wrap thin plastic around the tops of the bands to represent the "T" shape. Not perfect but I'm liking how it looks so far.
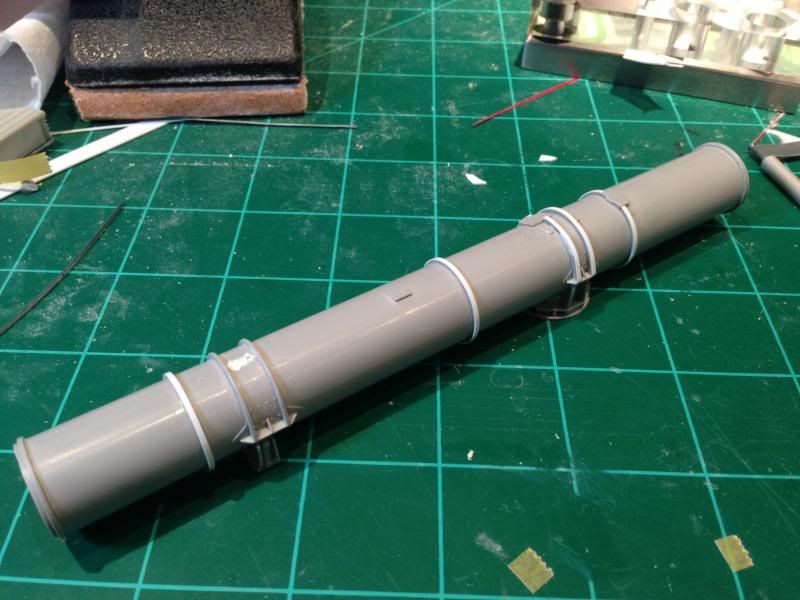
Here they are with the breach in place. Not glued yet. A little clean up needs to happen first.
You can also see where I've followed Stu's lead and started making the left had tubes match the right hand.
Dave
David Waples |
Total Posts: 1679 | Joined:
Jan 2, 2007 - 9:55pm | IP
Logged
|
|
Stuart Hurley
MASTER

|
Posted on: May 3, 2013 - 12:56am
|
David,
I hadn't noticed the double band at the breech. I will have to get the saw out. Again. 
I really like the look of the strip you have added to the bands to make them a T shape,
Best Regards,
Stu.
|
Total Posts: 255 | Joined:
Mar 19, 2013 - 3:32am | IP
Logged
|
|
Frank Andruss
TOP BOSS
|
Posted on: May 3, 2013 - 7:04am
|
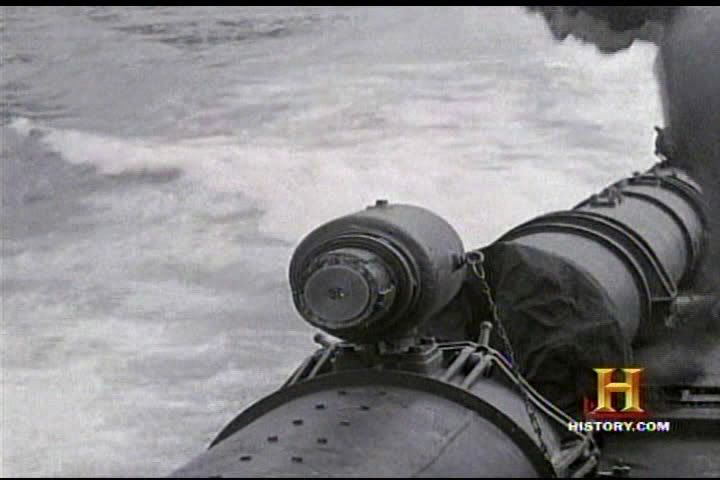
Dave, just curious, are you also going to add the securing chain that we see in the photo of the torpedo Flask.
|
Total Posts: 3964 | Joined:
Feb 9, 2007 - 11:41am | IP
Logged
|
|
JBG327

Advanced Member
|
Posted on: May 3, 2013 - 3:28pm
|
If this much is wrong on this kit, how much is wrong on the 596 kit?
|
Total Posts: 74 | Joined:
Sep 29, 2012 - 2:40pm | IP
Logged
|
|