| Author |
Topic: .50 Mount Update |
|
Jeff D

Moderator

|


 Posted on: Mar 19, 2014 - 10:20am Posted on: Mar 19, 2014 - 10:20am
|
I reworked the .50 mount after running ammo belts to the guns and finding the stretch between the lower and upper ammo guides had too many rounds. I knew the round spacing was about right since Jerry Beasley had sent me a belt of 6 rounds. Thanks again Jerry, I've got them in a glass fronted box on the wall where I see them often. There's also been a lot of new resources available since I originally created it thanks in large part to Jerry Gilmartin who sent hnsa several mount manuals (http://www.hnsa.org/doc/index.htm). Jerry also went out of his way to take measurements for me from PT 658 (http://www.savetheptboatinc.com). Frank Andruss (http://mosquito-fleet.gdinc.com) sent me photos of Liberty Aviation Museum's PT 728 project(http://www.facebook.com/Pt728Thomcat), they are having restoration expert Harland Avezzie (http://www.northamericanrestorations.com/) build them 2 mounts. Liberty's PT 728 Facebook page has a number of the images, the cradle with the gray back cover appears to be original. Check the post dated February 18. My favorite is the one of all the parts spread out. I actually drooled a little.
It's still mostly a guess and a Frankenmount of mixed mods but vertical and horizontal position should be real close:
http://www.pt103.com/PT_Boat_Components_Browning_50_Cal_M2_Twin_Mount_Mark_17.html.
I also updated the drawings that include the mount (stbd, aft, top) on this page:
http://www.pt103.com/PT_Boat_Components_Day_Room_Cabin_Trunk.html.
I plan on adding details for the later style support structure pedestal as seen on PT 658 since they are quite a bit different. That photo of Jerry in the turret will be a great reference. :D
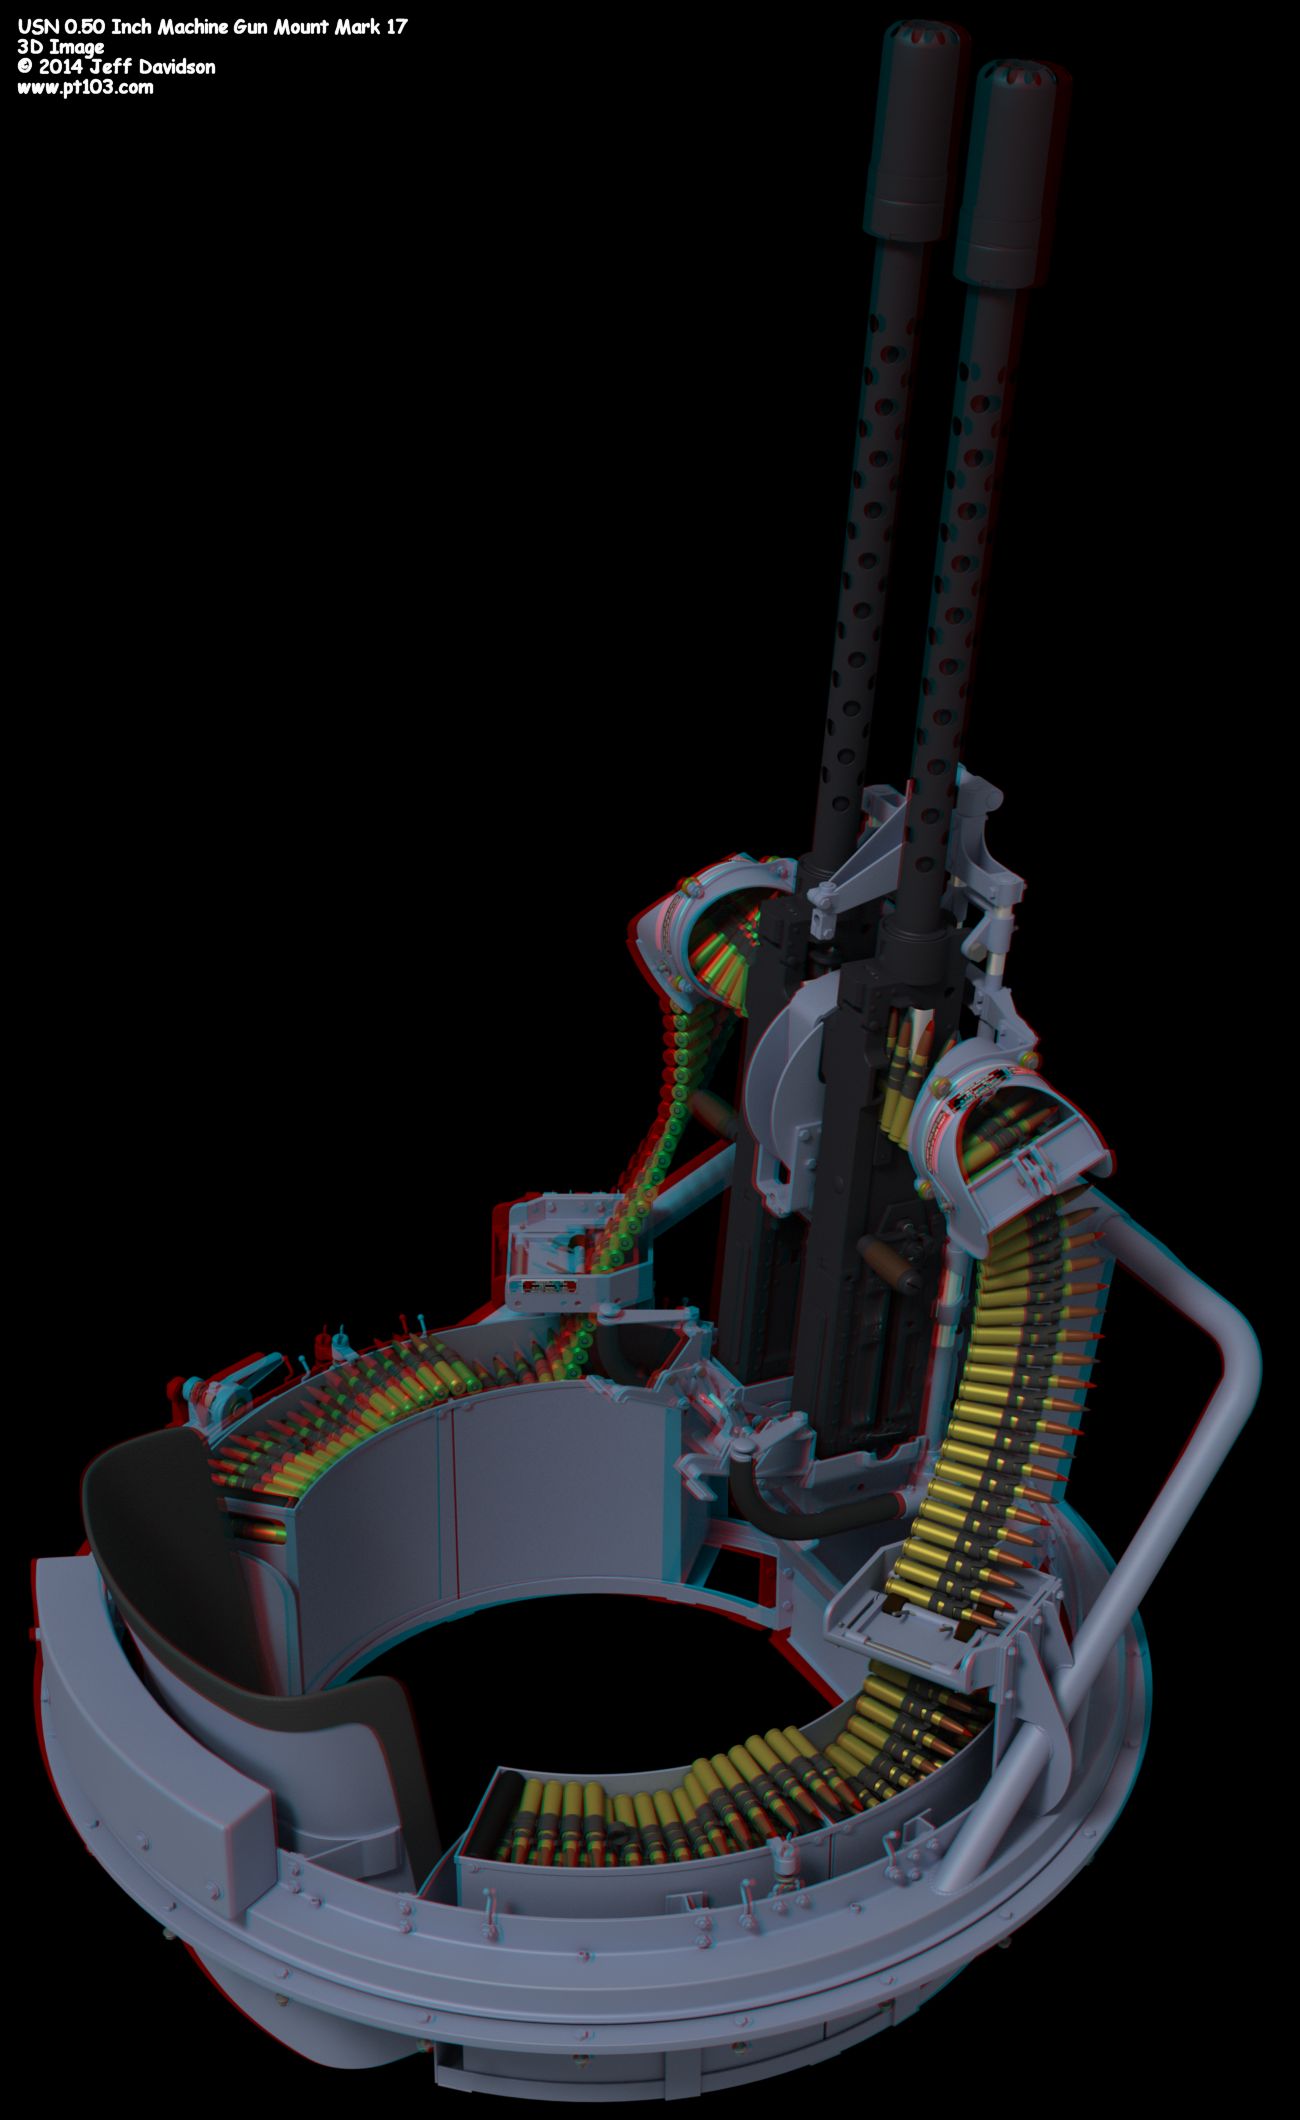
This one is for Dave Waples, and anyone else with those snazzy red and blue lensed 3D glasses: http://www.pt103.com/images/PT_Boat_50_Cal_Mount_Mark_17_Loaded_3D.jpg. Thanks for sending a set of glasses to me Dave! The image has had a few updates since the one I e-mailed you like the Mod. 1 & 2 hand brake. I gave up on the Mod. 0 brake for now.
|
Total Posts: 2200 | Joined:
Dec 21, 2006 - 1:30am | IP
Logged
|
|
Jerry Beasley

Advanced Member

|
Posted on: Mar 19, 2014 - 11:27am
|
Jeff have you got that right - if nothing else Dave is for a fact a Snazzy guy.
Beas
Jerry Beasley |
Total Posts: 89 | Joined:
Jan 9, 2008 - 4:27pm | IP
Logged
|
|
Kornbeef01

New Member
|
Posted on: Mar 19, 2014 - 11:35am
|
Wow and Grr at once. Do you realise what that does to us AMS afflicted modellers. I just spent ages modding ammo containers, now I need to tweak them.
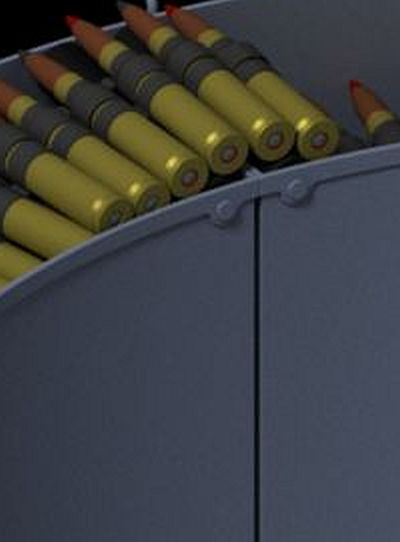
One tiny thing though, you seem to have the folded lip around the top of the ammo containers with no between the cans or is that my eyes (probably the latter.)
Stunning work though.
Keith
|
Total Posts: | Joined:
Unregistered | IP
Logged
|
|
Jeff D
Moderator
|
Posted on: Mar 19, 2014 - 3:47pm
|
It's all but invisible, good point I should round the edges a bit more:
|
Total Posts: 2200 | Joined:
Dec 21, 2006 - 1:30am | IP
Logged
|
|
Kornbeef01
New Member
|
Posted on: Mar 19, 2014 - 4:03pm
|
My olde eyes Jeff.... :-)
|
Total Posts: | Joined:
Unregistered | IP
Logged
|
|
 |
TED WALTHER |
TOP BOSS

|
Posted on: Mar 20, 2014 - 6:26pm
|
Jeff;
OUTSTANDING WORK!!! I can�t imagine how long it took you to do this, but it took me almost 5 hours to do make my version of a Smokey Yunick 1969 Camaro 396 Super Sport Trans Am race car on my son�s Forza 5 X BOX 1 game! It came out looking so real, I now want to buy a project car and do it up just like the one I made!
Take care,
TED
|
Total Posts: 3059 | Joined:
Oct 16, 2006 - 7:42am | IP
Logged
|
|
Jeff D
Moderator
|
Posted on: Mar 21, 2014 - 3:53am
|
Thanks Ted, yes it was a pain. Cool that you're involved with your son in his gaming, I spent many happy hours playing Mario Kart with mine. Later on we led an online gaming group for about 6 years, another source of happy memories. Of course he's always been able to kick my butt, there is no substitute for young reflexes.
I rounded off the can tops on the perspective view Keith, I can just make the separation out without zooming in. It was worth it, thanks for the feedback.
|
Total Posts: 2200 | Joined:
Dec 21, 2006 - 1:30am | IP
Logged
|
|
Jeff D
Moderator
|
Posted on: Mar 21, 2014 - 10:27am
|
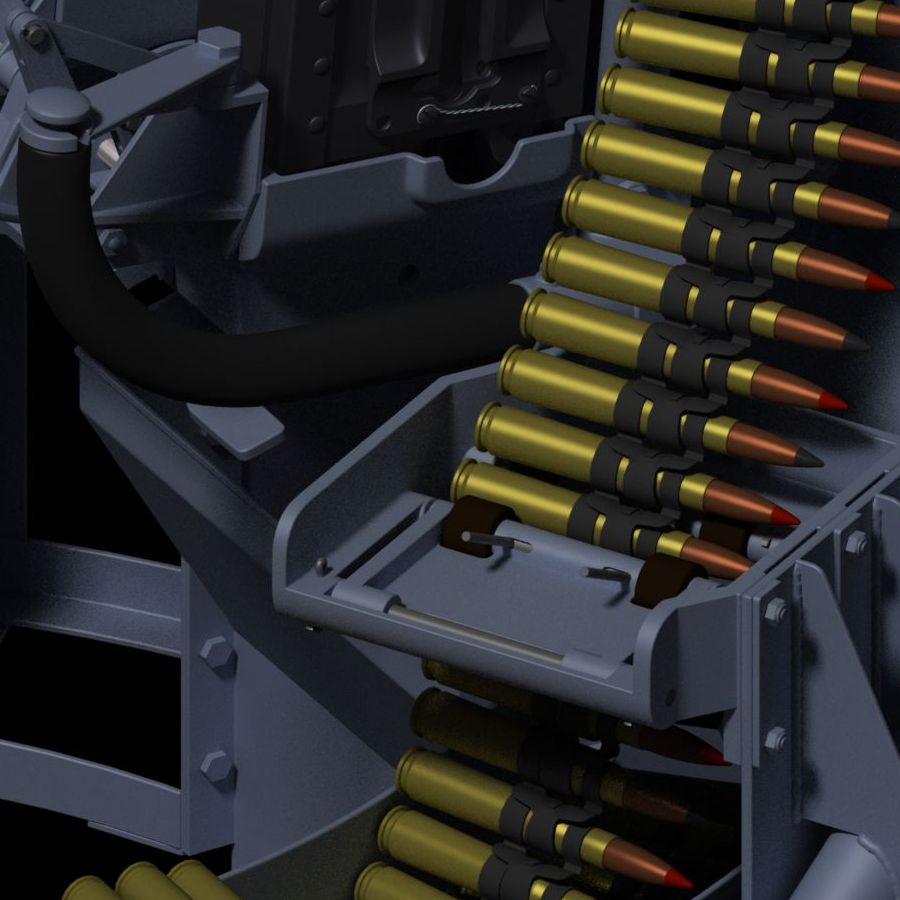
The moment of truth, rendering at a higher resolution. A lot of fuglies can appear since the model is basically a bunch of flat faces. I'm going to follow Dick's lead and try selling posters and such on Zazzle so the higher the resolution the better the print. This cropping shows the liftable trays for loading, squeeze the pins and the tray can be swiveled out of the way:
|
Total Posts: 2200 | Joined:
Dec 21, 2006 - 1:30am | IP
Logged
|
|
David Waples
TOP BOSS

|
Posted on: Mar 21, 2014 - 5:42pm
|
Jeff, I'm just amazed every time I see your drawings. Thanks for doing them and sharing with us.
Great references for us modelers.
Update! I just looked at them with my snazzy glasses. Awesome in 3D. Feel like I could just swing that mount up and start firing.
Dave
David Waples |
Total Posts: 1679 | Joined:
Jan 2, 2007 - 9:55pm | IP
Logged
|
|
Jeff D
Moderator
|
Posted on: Mar 21, 2014 - 6:47pm
|
You're welcome Dave, and thanks. I wish I could print you out a pair for your build...
|
Total Posts: 2200 | Joined:
Dec 21, 2006 - 1:30am | IP
Logged
|
|
|


